A penny stove is a light weight alcohol stove made from two pop cans (beer cans, energy drink cans, and other cans may be used too). These stoves, paired with a titanium cup create a great light weight cookset.
Depending upon temperature, wind, pot, etc, these stoves should boil a cup of water with approximately 1/2 oz of fuel (denatured alcohol).
There are many variations of alcohol stoves. The instructions below is just one example using standard 12 oz cans. The same measurements work for smaller cans (like energy drink cans) except the number of jets. For the smaller diameter cans you will probably want to use 4 or 5 jets.

Here's what you'll need to get started:
- 2 pop cans
- Penny
- Utility/Razor knife
- Needle nose pliers
- Marker
- Drill with 1/16" bit
- Masking/Painters tape
- High temp silicon/JB Weld (optional)
- Fiberglass insulation
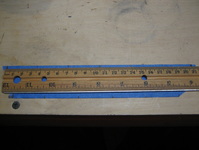
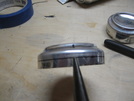
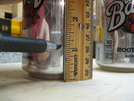 Step 1: Measure and cut one can 1 1/8" from the bottom. This will be the base/bottom of the stove. Measure and cut the second can 3/4" from the bottom. This will be the burner/top of the stove. Tip: Place your utility knife on a block or between some books and spin the can on the table to score & cut the cans. | 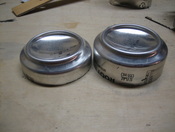
|
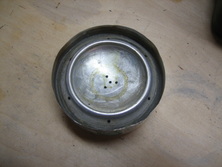
Step 2: Mark the center of the burner with a dot and 3 additional dots evenly spaced around the center (make sure a penny will cover all 4 dots). Use a 1/16" drill to make holes where the 4 marks are.
Step 3: Mark the crease around the burner and make 6 evenly spaced marks for the jets.
Use a 1/16" drill bit to make holes at each of the 6 marks
Tip: Use a piece of masking tape the length of the circumference of the can and measure 6 evenly spaced reference points. Wrap the tape around the can and transfer the marks.
Use a 1/16" drill bit to make holes at each of the 6 marks
Tip: Use a piece of masking tape the length of the circumference of the can and measure 6 evenly spaced reference points. Wrap the tape around the can and transfer the marks.
| 
|
Step 4: Mark the burner all the way around, approximately 1/2 way down the flat side. Use needle nose pliers to crimp the can by bending toward the center of the can at each jet (The crimps will only go down to the line you marked 1/2 down the side). Now, make 6 more crimps in between the crimps you just made. Use a 1/16" drill bit to drill 6 holes in the crimps above each jet.
| 
|
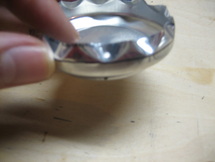
Step 5: Press the burner into the base, crimped end first. Be careful not to crush the burner against the bottom of the base.
Tip: Place the burner in the freezer for a few minutes before trying to press into the base. Use the top of another can to help press the burner in.
I like to use a small bead of high temp silicon or JB Weld inside the base to ensure a good seal (about 1/8" down from the top of the base). Some people also like to use insulation inside the stove to keep fuel from sloshing.
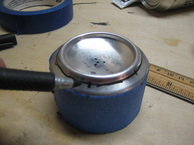
Step 6: Mark and cut the top of a can approximately 1/2" tall. This will be the stand for the stove and will insulate it from the ground.
Tip: I like to glue a little bit of insulation on the top to help keep the stove in place and proved additional insulation.
Tip: I like to glue a little bit of insulation on the top to help keep the stove in place and proved additional insulation.
Since these are so simple to make, make a few and play with the design a bit!
If you have any questions or thoughts, please leave a comment.
If you have any questions or thoughts, please leave a comment.
 RSS Feed
